6. Replicator Playground
6.1. Learning Objectives
This example extension will demonstrate at a high level how to create a workflow for generating synthetic data interactively. The purpose of this tutorial is to provide a simple example extension for generating synthetic data and should be noted that the code is not intended for production use.
30-45 min tutorial
6.2. Getting Started
Although this is a stand alone tutorial, it is recommended that you complete at least Hello World before starting.
6.3. Scenario Setup
6.3.1. Load Scene
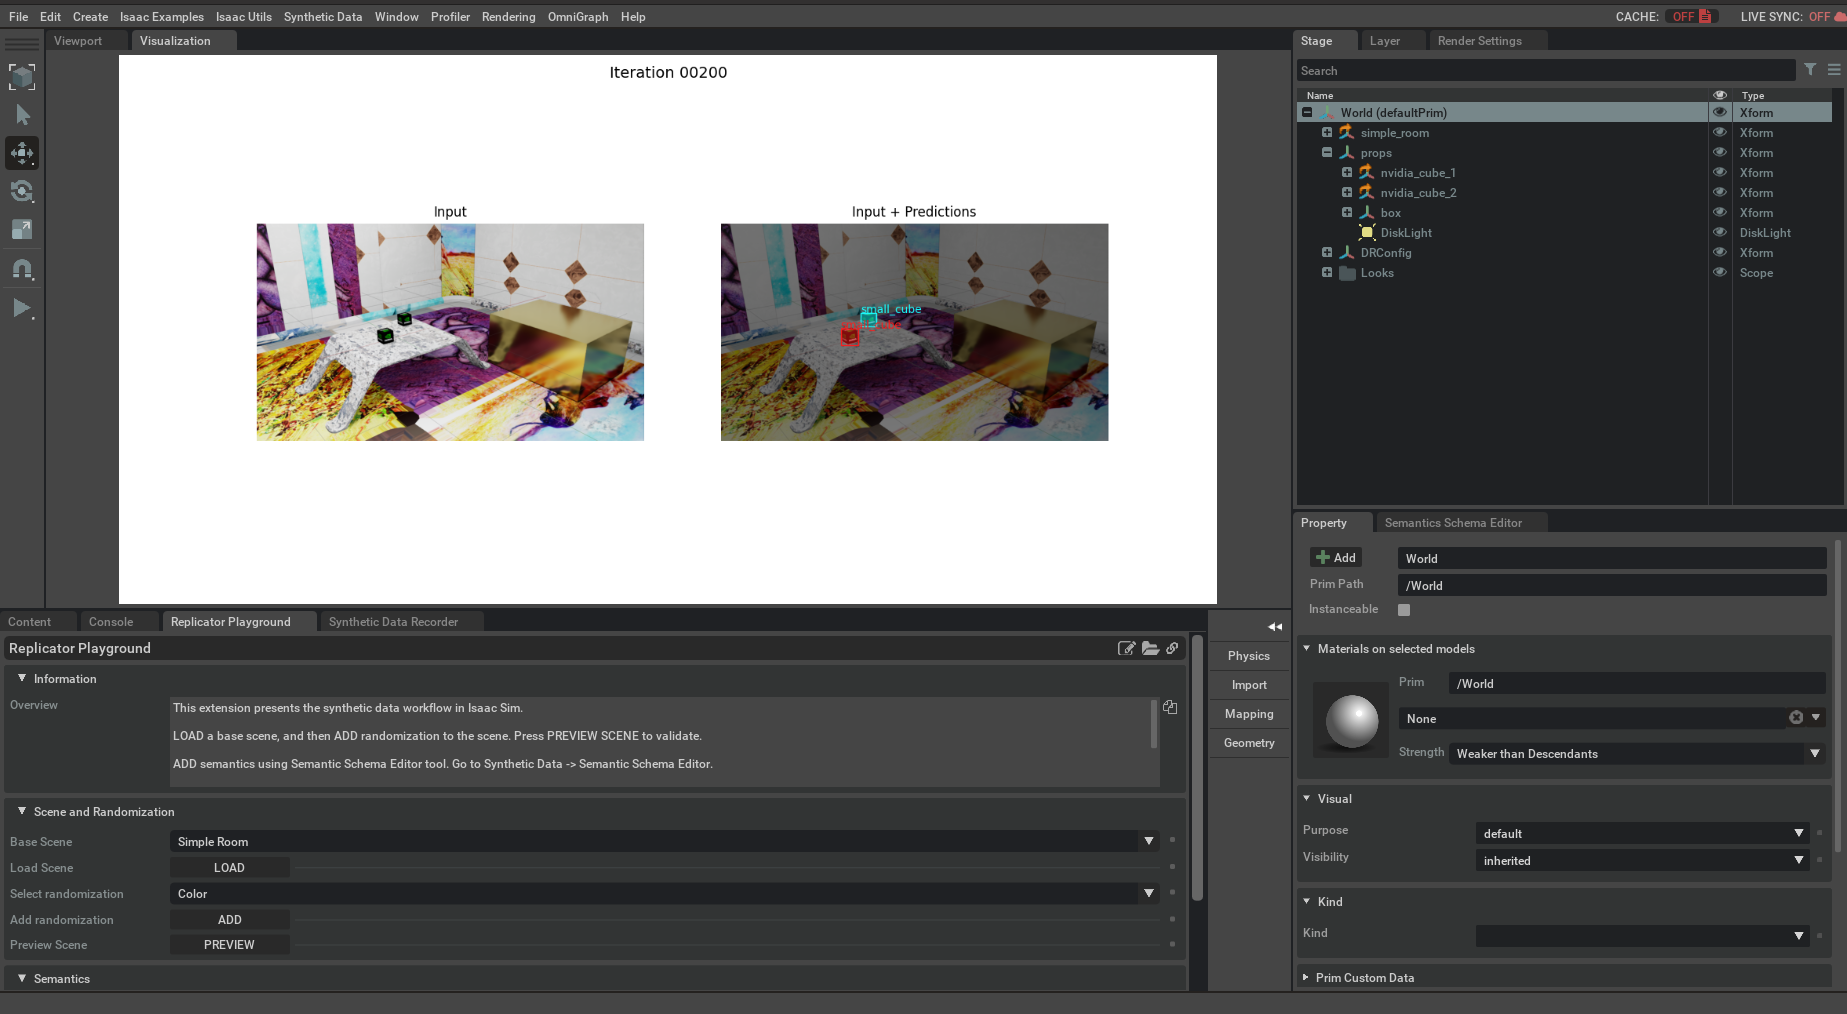
The first step in setting up synthetic data generation is loading your scenario and assets. In the playground there are 3 prebuilt scenarios provided to choose from. For the purpose of this tutorial select simple room and click load scene. Under the stage tab on the right there is 3 high level Xforms:
simple_room: Holds all the assets for the room
props: Holds the cubes and the light use by domain randomization
DRConfig: Holds all the pre-configured domain randomization components
At this point if the play button on the left side of the screen is clicked, properties of the scene will begin to randomly change due to the domain randomization components.
6.3.2. Adding Domain Randomization
Domain randomization is a technique for generating diverse sets of data by randomly altering parameters of the scene with the aim of increasing generalization through diversity. If the simple room scene is loaded there is already domain randomization components in the stage. However through the Replicator Playground more domain randomization components can be added. Learn more about domain randomization here.
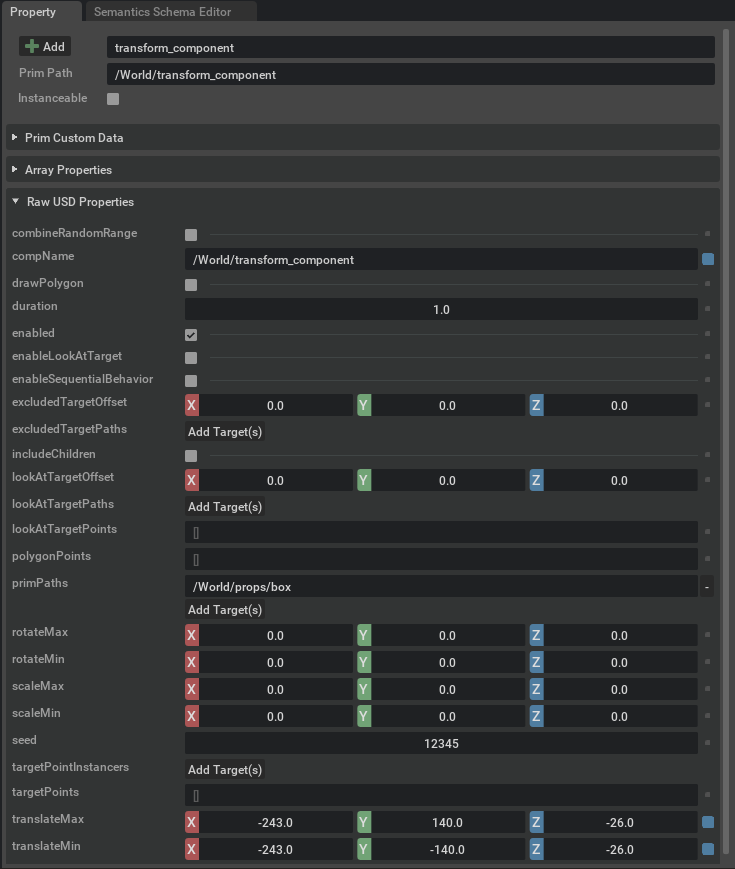
An example for the simple room is to add a transform component for the large box in the corner:
Add Transform Component
Select the new Transform Component from stage
Under the property tab -> Raw USD Properties -> PrimPaths add a target to /World/props/box
Set the translateMin/translateMax respectively to: x=[-243,-243] y=[-140,140] z=[-26,-26]
Set Duration to 1.0
When play is pressed the large box should now be randomly move along its y-axis

Note
More domain randomization components are available from the top menu under Synthetic Data -> Domain Randomization -> Components
6.3.3. Semantic Object Tagging
The next step is to semantically tag objects in the scene that need labels in the ground truth generation. With the semantic schema editor extension the objects of interest can be tagged through the UI. To add class labels select the object of interest(ex: cubes) needed for the downstream training task set New Semantic Type to class and New Semantic Data to the desired class label. Once Add Entry On All Selected Prims is clicked the class semantics will be attached to the properties of the prim.
6.3.4. Visualize the Data
Once the proper prims are tagged the ground truth can be previewed with the Synthetic Data Visualizer tool.
To leverage the tool, press the  icon in the Viewport window and the extension UI will become visible.
After the Visualize button is pressed, it loads an additional window where the visualization results will be displayed.
6.4. Recording Dataset
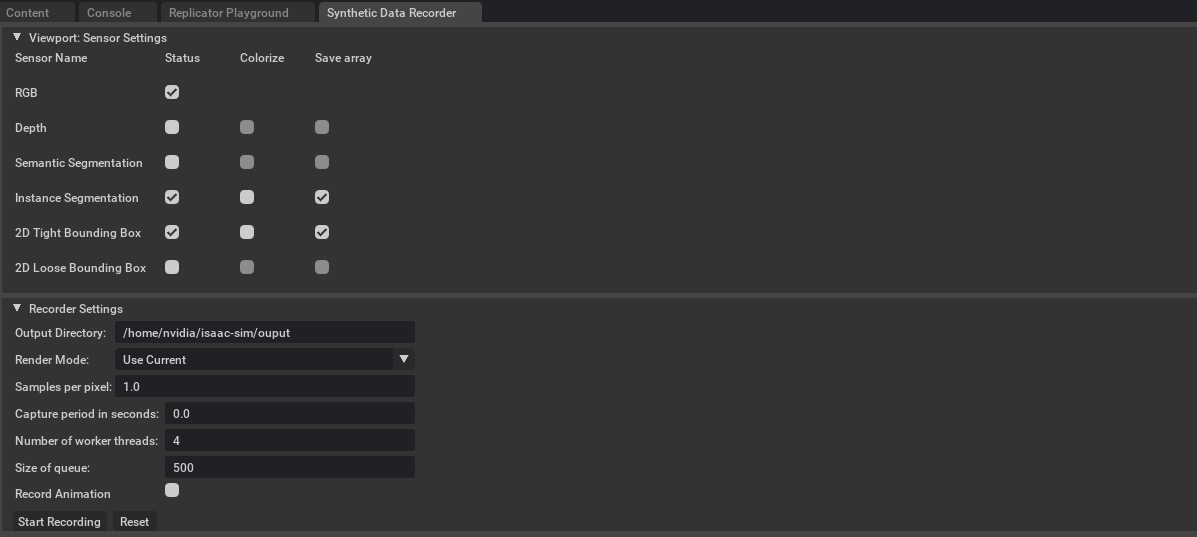
Now that the scenario is setup for synthetic data generation the ground truth can be recorded. The Synthetic Data Recorder is an example extension that allows for easy synthetic data recorded. Use the following directions for the purposes of Synthetic Playground:
Select RBG, 2D Tight Bounding Box, and Instance Segmentation status boxes
Select Save array for 2D Tight Bounding Box and Instance Segmentation
Specify output directory where ground truth will be written
Press Play on the Scene
Press Start Recording on the Synthetic Data Recorder
Press Stop when enough data has been generated

6.5. Training
Once the training data has been generated a computer vision model can be trained on the synthetic data.
Set Input Directory to the location of the generated data
Select Training Scenario, FasterR-CNN will be trained for object detection and MaskR-CNN will be trained for instance Segmentation
Click Load Data to load the data for training
Click Generate Statistics to see information about the dataset
Click Start Training to begin training the model
As the model trains the predictions after each iteration will be visualized to show how the model is improving. Currently the model is not being saved after training as the purpose of this tutorial is to introduce synthetic data generation and not to be used for any deployment scenario.
Note
There may be a noticeable hit on FPS as the model is simultaneous being trained and predictions displayed.

6.6. Summary
In this tutorial we ran through the entire pipeline for training detection models with synthetic data.
6.6.1. Next Steps
Take a look at the tutorial Offline Dataset Generation to learn how to begin to scale and customize data generation.
