Using the Scene Optimizer
Finding The Extension
Note
This extension is enabled by default in USD Composer 2022.3.0 and above.
The Scene Optimizer panel can be opened via the Window -> Utilities -> Scene Optimizer menu item.
The extension can be enabled/disabled via the Window -> Extensions window.
Search for Scene Optimizer.
- There are three extensions available. You will see:
omni.scene.optimizer.coreomni.scene.optimizer.uiomni.scene.optimizer.bundle
In most cases enabling the bundle extension is all that is needed. This will
load both core and ui extensions automatically.
Using The Scene Optimizer
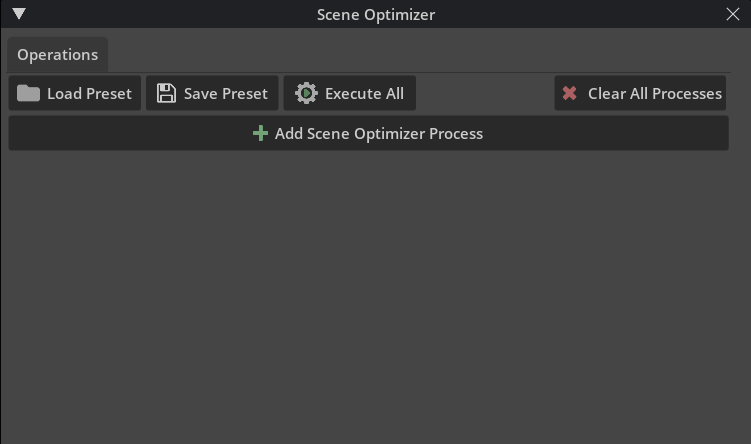
When the Scene Optimizer is enabled, the following UI is displayed:

- Load Preset
Load a previously saved JSON configuration file describing a series of processes.
- Save Preset
Save the current process stack to a JSON file for later use.
- Execute All
Executes all of the processes that are configured from top to bottom.
- Clear All Processes
Removes all processes from the UI.
- Add Scene Optimizer Process
Add processes that will be performed on the stage.
Reordering Processes
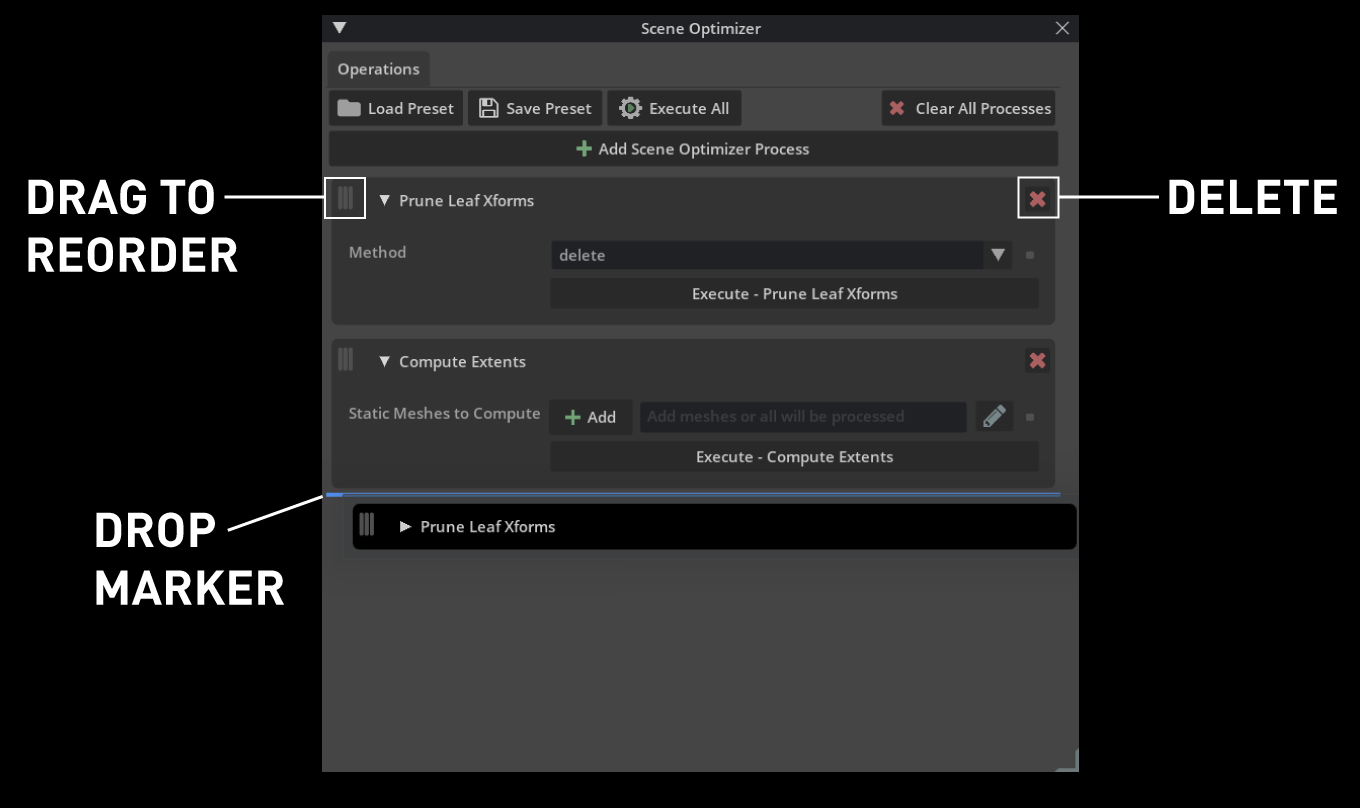
As processes are added they will be appended to the list. Processes can be reordered (click and drag the drag handle
in the top-left corner of a process) or removed (click the delete button in the top-right corner of a process). You
can also expand/collapse a process by clicking on the top header section of it.

The image above shows the main interface with a couple of processes, in the middle of a drag operation. The blue drop target highlights to show where it is valid to move a process. Also shown are where to click to initiate a drag or delete a process.
Editing Prim Paths
Some processes can have a list of prim paths or regular expressions specified in order to restrict what they operate on:

Those processes will have an argument that looks like the screenshot above. You can freely type a prim path or
regular expression in the text field. Clicking Add will add any selected prims in the stage to the list.
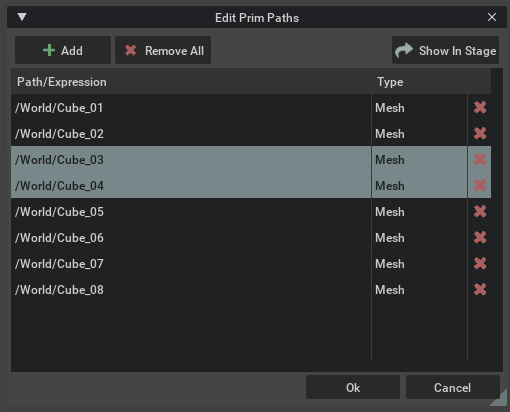
Clicking the pencil icon will open a new window, shown below, that lets you more easily manipulate what is
included.

This panel lets you add the stage selection, delete items, or select items in the stage.
Integrations
The scene optimizer is also available in the following integrations:
- Standalone Application
A command line tool that offers faster load times and is convenient for scripting to process multiple files.
- Revit Connector
A direct Revit integration that utilizes the core optimization libraries found across scene optimizer operations.
- Creo Connector
A direct Creo integration that utilizes the core optimization libraries found across scene optimizer operations.
- Archicad Connector
A direct Archicad integration that utilizes the core optimization libraries found across scene optimizer operations.

